
Back in the day, Windows XP has given us the privilege to access our applications in the easiest way possible. Just by going through your quick launch toolbar, you can easily open the essential things on your computer with a few clicks. Of course, as numerous updates took place, we eventually said goodbye to this feature when the Windows 7, 8, and 10 came in. This made a lot of users frustrated, especially those who are using their computers in their respective professional fields.
If you are still using a Windows computer, there is a way you can quickly add or remove the quick launch toolbar. You do not have to go through a difficult process when doing this. Also, it is a good thing you are reading this article. If you are having a hard time figuring this out, you can follow these easy steps on how to add/remove quick launch toolbar on Windows 7, 8, and 10.
The Importance of a Quick Launch Toolbar
When you have a quick launch toolbar on your desktop, your computer time would be ten times easier. Instead of scrolling around looking for that one software in a seemingly crowded screen, you can click this feature and easily launch your applications without any hassle. The quick launch toolbar can help you save a lot of time in the workplace, and it will also make your desktop neater. If you enable this feature on your computer, all your essential applications will be stored in one easily accessible place.
How to Easily Add the Quick Launch Toolbar
Adding the quick launch toolbar on your main taskbar is not that hard. All you have to do is to follow this simple step-by-step procedure, and you are good to go. This instruction applies to Windows 7, 8, and 10, so you won't have a problem if you are using any of these operating systems.
1. Access the Taskbar

For the first step, go to your desktop's taskbar (bottom or top bar, depending on your settings) and right-click it. You will see a tab there that says "Toolbars", and you only need to highlight it. After that, click on the part that says "New toolbar...", and wait for it to load.
2. Creating the Quick Launch Toolbar

After the first step, a window should pop up. You will see a text box or path on this window, just at the top of "On the New Toolbar". Simply copy this text and paste it on that path:
%APPDATA%\Microsoft\Internet Explorer\Quick LaunchAfter that, simply click on the "Select Folder" part, and your quick launch toolbar will be in place.
3. Relocating the Quick Launch Toolbar
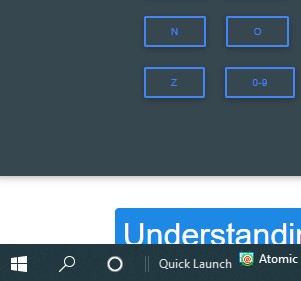
The original quick launch toolbar on the Windows XP is placed on the left portion of the taskbar. In this case, you will see the toolbar on the right side, next to the other digital accessories of your computer.
To relocate the quick launch toolbar, the first thing you need to do is to unlock the taskbar. Simply right-click on any empty area within the taskbar, click the part that says "Lock the taskbar", and see if it has a check mark on its side. If the check mark is removed, then the taskbar is unlocked.
After unlocking the taskbar, simply drag the two lines beside the quick launch toolbar to the left side. If you have a Windows 8 or 10 operating system, you cannot move past the Windows Store, Edge, File Explorer, Cortana, and Task View icons.
4. Removing the "Quick Launch" Title
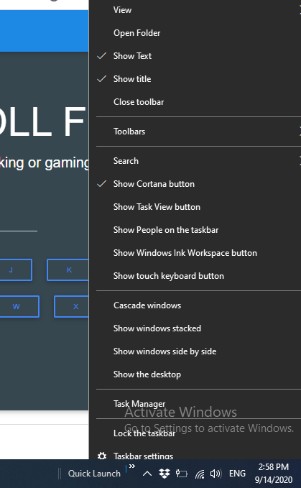
Originally, the quick launch toolbar does not have a name. If you want yours to look that way, you can easily remove the name by accessing the taskbar. Simply right-click on the quick launch toolbar, click the "Show title" part, and see if the check mark is removed. After doing this, you will only see the double-arrow icons of the toolbar.
5. Lock the Taskbar
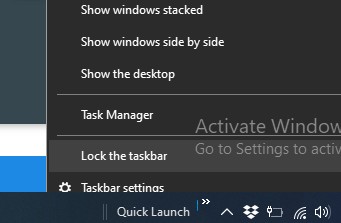
After enabling the quick launch toolbar on your computer, it is now time to lock the taskbar so you can avoid unwanted complications that might occur. Simply right-click on an empty area within your taskbar, click the part that says "Lock the taskbar", and you are good to go!
How to Remove the Quick Launch Toolbar
If you do not want to use the quick launch toolbar anymore, simply unlock your taskbar and find the toolbar section again. Click on the "Quick Launch" portion to uncheck that feature, and you are good to go. You will not see the quick launch toolbar on your taskbar once you do this. If you want to enable it again, you will have to go through the steps again.
Having a quick launch toolbar on your desktop can make your work ten times easier. It saves time, it keeps your desktop neat, and it can actually boost your productivity. We all have our specific preferences when it comes to using this feature.